
Outdoor Digital Advertising Screen OEM: A Complete Guide to Custom Solutions
2026-09-26
A complete guide to outdoor digital advertising screen OEM has to start with a hard truth: the display that works inside a mall can go dark on a sun-blasted highway or freeze in the first winter storm. That's why custom solutions matter more than ever—not just in panel size, but in thermal design, anti-glare coating, enclosure strength, and remote monitoring. In this guide, we walk through what to ask for, what to avoid, and how to turn your site's constraints into a screen that sells. And when you're ready to move from specs to production, zemso brings OEM experience that keeps outdoor campaigns running long after cheaper screens give up.
Why Thermal Design Makes or Breaks Outdoor Digital Screen Projects
Outdoor digital screens face a brutal thermal reality: direct sun exposure can push internal temperatures far beyond what standard electronics tolerate. Without a deliberate heat management strategy, the enclosure turns into a solar oven, accelerating LED degradation and warping structural components. The difference between a screen that lasts eight years and one that fails in eighteen months often comes down to how well the design moves heat away from critical parts.
Passive cooling alone rarely cuts it in hot climates or south-facing installations. Active ventilation, heat sinks bonded to the back of LED modules, and reflective coatings on the housing all work together—but they must be balanced against dust and moisture ingress. A vent that solves overheating but lets in fine sand or rain will trigger a different kind of failure. Smart thermal design means treating airflow, material choice, and environmental sealing as one interconnected problem, not separate checkboxes.
Field data from repair teams shows a clear pattern: the most common root cause of outdoor screen downtime is not the display controller or power supply, but heat-related stress on solder joints and driver ICs. When engineers push a design into higher brightness without revisiting the thermal path, they inherit a shorter mean time between failures and a warranty liability that grows with every summer. Getting thermal design right early avoids costly retrofits like adding external shade structures or derating brightness after installation.
How to Specify Brightness Levels for Direct Sunlight Without Wasting Budget
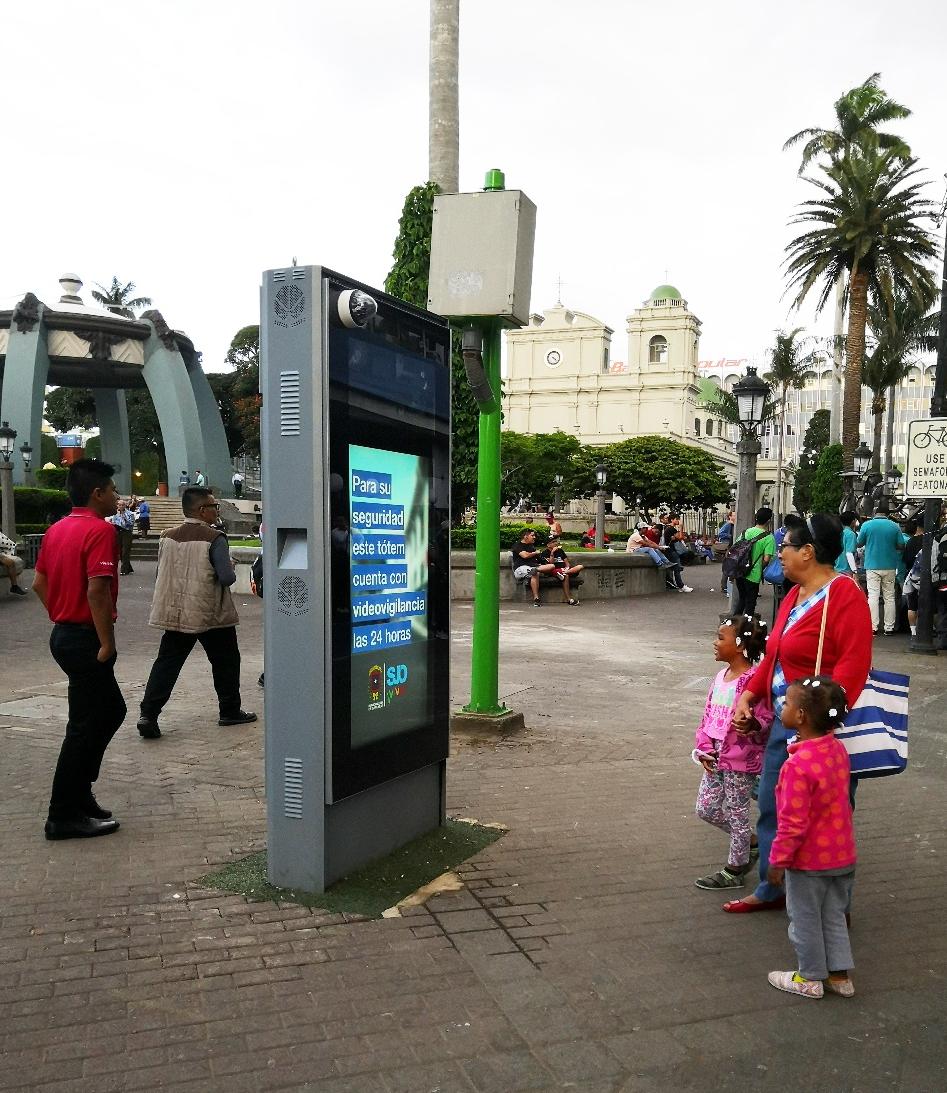
Grab a light meter and spend a day at the actual installation spot. Direct sunlight isn't a constant—it shifts from 10,000 lux in the morning to over 100,000 lux at noon, then drops again. Many teams pick the absolute peak and over-spec the display, but that's where budgets get burned. Record the real numbers at the exact times the screen will be used. If the panel sits under an awning or faces north, the required brightness can be much lower than a south-facing wall in full glare. These measured values give you a defensible baseline.
Think in terms of contrast and surface treatment, not just nits. A matte, high-contrast panel at 1,200 nits can beat a glossy, low-contrast one rated at 2,500 nits when the sun hits it. Also, what you show matters: a mostly dark interface or video needs less brightness than a spreadsheet with a white background. An ambient light sensor that ramps from 600 to 2,000 nits based on real-time conditions handles most outdoor swings without paying for a constant 3,000-nit panel.
Before signing off on a spec, get a sample unit and bolt it to the actual wall for a week. Data sheets lie—different LCD or LED technologies reflect sunlight in very different ways. Watch the screen at 9 a.m., noon, and 4 p.m., and note whether you can read the smallest text you'll display. Then spec the lowest brightness that works for those conditions. You'll often find that a 1,500-nit display with a good optical bonding layer outperforms a cheaper-built 2,500-nit model, saving money while keeping readability.
The OEM Partner Checklist Every Buyer Should Work Through
Most buyers jump straight into pricing before verifying whether a factory can actually hold a tolerance. That backwards approach is why so many product launches stall at the prototype stage. Before you compare unit costs, confirm the basics: Does the partner have experience with your material grade? Are their quality records from the past twelve months, not just a framed certificate from three years ago? These checks take a few days but save months of rework later.
Work through the list methodically. Ask for a recent process audit and the names of two clients who ordered similar volumes. Check whether their in-house tooling matches your specifications, then ask about secondary processes like plating, coating, or final assembly — defects tend to hide in the handoffs. Dig into capacity too: can they scale from a thousand units to twenty thousand without swapping your project manager or moving your line to a subcontractor?
Finally, protect yourself on the commercial side. Review warranty terms line by line, and confirm who owns the intellectual property in any custom tooling. A supplier that hesitates on either answer is probably not worth the risk, no matter how polished their sample line looks. The right OEM partner will treat these questions as routine, not as an inconvenience.
Field-Proven Weatherproofing That Goes Beyond Standard IP Ratings
Most enclosures earn their IP rating in a controlled lab, but real deployments throw in variables no test chamber can fully replicate. Our weatherproofing is validated on rooftops, coastal installations, and remote infrastructure where salt spray, thermal shock, and driving rain hit from multiple angles at once. That ongoing exposure data feeds back into seal geometry, vent placement, and material selection—so the rating on paper is just the starting point.
Standard IP tests check for water and dust ingress under fixed pressures and durations. They don't account for UV-degraded gaskets, repeated freeze-thaw cycles, or the abrasive grit that works its way into moving parts over years of service. We run accelerated life testing alongside long-term outdoor test sites to catch those slow failures early. The result is a design that stays dry and functional well past the point where typical certified enclosures start showing moisture inside.
That difference shows up in the details: double-sealed cable entries that maintain integrity during thermal cycling, pressure-equalizing vents that keep condensation out without sacrificing breathability, and gasket compounds chosen for cold-flow resistance rather than just initial durometer. Field reports from solar farms, traffic systems, and marine terminals confirm the same thing—equipment stays protected through seasons that would embarrass a lab-only IP rating.
Custom Mounting and Installation Details That Prevent Costly Rework
The real cost of rework often hides in the gap between a clean design and the realities of the job site. Custom mounting details—like offset brackets that account for uneven concrete or slotted channels that allow thermal movement—do more than satisfy the drawing; they give installers breathing room for field surprises. When each anchor point is treated as a unique condition instead of a repeated symbol, the team can catch interference with existing conduit or ductwork before it turns into a punch-list item.
Good installation details also cut down on field improvisation. Rather than asking a foreman to stack shims or weld a bracket on the fly, a custom mount designed around the actual substrate and load path removes that guesswork. For example, choosing a fiberglass standoff for a rooftop unit on a membrane roof prevents the classic mistake of using metal that tears the waterproofing. That single material call avoids a six-week repair cycle after the first storm.
Finally, write the details as a sequence, not a static snapshot. Include torque values, pre-drilling depths, and the tightening order so that vibration-sensitive equipment doesn't drift out of alignment. When a custom mounting detail reads like a short shop manual, the installer can execute it right the first time, and costly rework stays a line item that never gets used.
Remote Monitoring and Smart Features That Lower Long-Term Operating Costs
Modern equipment often comes with built-in sensors that track performance metrics like energy draw, vibration, and temperature in real time. Instead of relying on scheduled checkups, facility teams can watch these feeds from a dashboard and spot anomalies early—a slight uptick in compressor runtime or a gradual drop in airflow efficiency. Catching these shifts before they become failures prevents expensive emergency repairs and extends the service life of key components, trimming both parts and labor budgets over the years.
Smart control algorithms go beyond simple on/off scheduling. They learn usage patterns and adjust output to match actual demand, avoiding the waste of running at full capacity during low-load periods. For example, a ventilation system can scale fan speed based on occupancy sensors and indoor air quality readings. This dynamic tuning not only lowers utility bills month after month but also reduces mechanical wear, meaning fewer replacement cycles and less downtime for mission-critical operations.
Remote diagnostics shift maintenance from reactive to proactive without requiring a technician on site for every hiccup. When a parameter drifts outside its normal range, the system can flag the issue and even suggest likely causes, allowing staff to order the right part before a visit. Over time, this streamlines inventory management—no more stocking rarely used spares—and cuts travel time for outside contractors. The result is a leaner operating budget where maintenance costs become predictable instead of surprise line items.
FAQ
OEM means the manufacturer builds the screen to your specifications, from the enclosure dimensions to the brightness level, control board, and even the logo printed on the chassis. You're not stuck adapting an off-the-shelf panel; the product is engineered around your deployment needs, whether that's a 75-inch standalone kiosk or a double-sided hanging display for a transit shelter.
Typically you share the basics: screen size, installation environment, expected daily runtime, and any specific IO or connectivity requirements. A good OEM will then propose a base platform, walk through thermal management options, and provide CAD drawings for approval before tooling begins. Expect at least two sample rounds for mechanical fit and brightness tuning unless you're ordering a very high volume.
Direct sunlight demands at least 2,500 nits for comfortable viewing, but many buyers push to 3,500 or even 5,000 nits for south-facing or low-latitude installations. It's not just about the backlight; you also need an ambient light sensor that adjusts output dynamically, otherwise the screen either washes out at noon or blinds people at night.
Powder-coated aluminum or stainless steel are the usual choices. Aluminum offers a good strength-to-weight ratio and resists corrosion, while stainless steel is better for coastal or industrial areas with salt or chemical exposure. Avoid raw steel unless you plan to repaint it annually. The gasket and cable glands matter just as much as the metal—look for IP65 or higher on the front face and proper drainage channels.
Yes, but outdoor touch needs special treatment. Projected capacitive touch works through thick tempered glass, but you'll want an anti-glare and anti-fingerprint coating, plus a controller that can handle wet or gloved fingers. Some OEMs offer optical touch frames for very large displays, though they can be triggered by rain if not calibrated properly.
Most OEMs will pre-load an Android-based system or a commercial-grade media player, and you can specify the CMS platform, whether it's a mainstream option like BrightSign or a custom Linux build. The key is to confirm remote monitoring capabilities—temperature reporting, fan status, and automatic reboot schedules—so you're not sending a technician every time a screen drops offline.
For a new tooling project, budget four to six months. That includes mechanical design, thermal simulation, sample builds, outdoor soak testing, and certification like CE or UL. If you can reuse an existing enclosure and only change the electronics or cosmetic parts, the timeline can shrink to eight to ten weeks.
Beyond the unit price, factor in shipping with crating, customs duties if importing, spare parts for the first two years, and the cost of local electrical work for proper grounding and surge protection. Also, many buyers forget about content creation and remote management licenses, which can exceed the hardware cost over a five-year lifespan.
Conclusion
The real test of any outdoor digital screen isn't the spec sheet—it's how the hardware handles heat, sunlight, and the compromises a buyer accepts. Thermal design determines whether a panel throttles on a summer afternoon or keeps full brightness through the hottest hours. When specifying brightness for direct sunlight, the goal isn't maximum nits; it's balancing legibility against power draw and heat load. Working through a detailed OEM partner checklist means verifying thermal simulations, LED binning, and driver efficiency before signing, because these choices quietly shape the screen's lifespan.
Weatherproofing should go beyond a printed IP code. Field-proven enclosures include gasketed cable entries, pressure equalization, and UV-stable gaskets that survive repeated thermal cycling. Custom mounting and installation details—like access for service, structural load paths, and pre-drilled brackets—prevent expensive rework after the screen is on-site. Finally, remote monitoring and smart features aren't add-ons; they're the difference between dispatching a tech for a false alarm and resolving a minor fault from the office, which lowers long-term operating costs in a way no initial discount can match.
Contact Us
Contact Person: Leo
Email: [email protected]
Tel/WhatsApp: +86 18901905138
Website: https://www.zemsogroup.com/