

Professional Distribution Box Selection and Installation Tips
2026-09-28
Let’s face it—most people don’t think about distribution boxes until something goes wrong. But whether you’re wiring a new workshop or upgrading an old panel, the choices you make now can save you from headaches, downtime, or even serious hazards down the line. At Chang Song, we’ve seen too many installations fail simply because the box wasn’t matched to the job. In this guide, we’ll walk you through the key selection criteria and installation tips that professional electricians swear by—so you can get it right the first time.
Match the Enclosure to Its Environment Before You Buy
A lot of enclosure problems start with a simple mistake—buying the box before studying the spot where it will actually sit. Take an hour to watch the mounting location before you compare sizes or prices. Is it baking in full afternoon sun? Does rainwater pool underneath or drip from a roof edge? Is there fine dust from a gravel path, or salt in the air if you’re close to the coast? These little details matter more than the brand label or the color.
Once you know the conditions, match the material and rating to what’s actually there. A basic powder-coated steel enclosure is fine in a dry, shaded hallway, but it will start to rust within months in a humid washdown area or near the ocean. For those tougher spots, choose 316 stainless, fiberglass-reinforced polyester, or UV-stabilized polycarbonate. And don’t just look for the word "waterproof"—check the specific IP or NEMA rating against the real threats: dripping water, hose spray, fine dust, or temporary flooding. Not all gaskets survive constant temperature swings without cracking.
Heat and condensation are often the parts people forget. A sealed box in direct sun can turn into an oven and cook the electronics inside, even on a mild day. If your location has wide daily temperature shifts, plan for ventilation with filtered fans or a heat exchanger, and add a drain vent or desiccant pack to keep moisture from building up. Matching the enclosure to these conditions before you buy saves you from rewiring, rust repair, and early replacement later on.
Why Overloading a Distribution Box Is a Costly Mistake
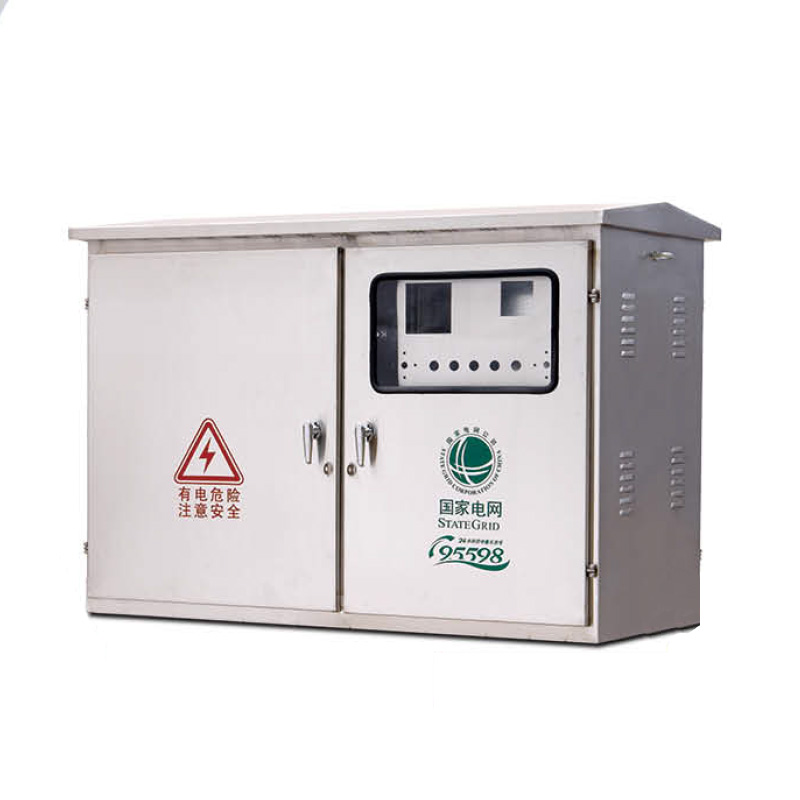
Overloading a distribution box might seem like a quick fix when you need more power, but the consequences can be far more expensive than adding a subpanel or upgrading the service. Each circuit breaker is rated for a specific amperage, and when too many devices draw current through the same box, the wires and bus bars heat up. This thermal stress degrades insulation over time, leading to short circuits or even electrical fires that destroy equipment and structures.
Beyond the immediate safety risks, an overloaded distribution box often causes nuisance tripping. When breakers trip repeatedly, people sometimes replace them with higher-rated ones without upgrading the wiring—a dangerous practice that can allow wires to overheat before the breaker ever trips. The resulting damage to connected electronics, lost productivity from unplanned downtime, and the cost of emergency repairs quickly dwarf the price of a proper load calculation and panel upgrade.
Insurance companies may also refuse claims if an investigation finds that an overloaded distribution box contributed to a fire or equipment failure. This leaves the property owner fully liable for restoration costs, which can run into tens of thousands of dollars. In short, the "savings" from avoiding an electrical upgrade are an illusion—the real cost shows up later in damaged hardware, higher insurance premiums, and the risk of catastrophic loss.
A Step-by-Step Guide to Mounting Without Guesswork
Start by laying out every component on a clean, flat surface. Match each screw, bracket, and anchor to the illustration in your manual before touching a single tool. This simple habit eliminates the most common source of mounting errors: grabbing the wrong fastener halfway through the job.
Next, measure and mark your mounting points directly on the wall or surface, using a level to keep everything true. If you are working with drywall, tap gently to locate studs or use a small pilot hole to confirm what sits behind the surface. Never trust the printed template alone—walls are rarely as square as the diagrams assume.
Finally, drive the hardware in stages rather than fully tightening each screw in sequence. Start with the top center or a corner, check alignment with the level after every two or three turns, and adjust before the final snug. This approach turns mounting from a gamble into a repeatable routine that fits any bracket, shelf, or frame you encounter.
Common Grounding Errors That Trip Up Installers
Plenty of installers assume a metal conduit run will carry fault current as well as any dedicated copper conductor. In practice, loose couplings, paint overspray, or corrosion break that path, leaving equipment without a reliable return. The fix is straightforward: pull an equipment grounding conductor sized to the circuit and land it on every device, enclosure, and panel in the run.
Another common slip is bonding the neutral and ground at more than one point. That seems harmless at first, but it turns the grounding system into a parallel path for normal neutral current. The result can be stray voltage on conduit, enclosures, and even plumbing. Keep the neutral isolated from the ground everywhere except the main service disconnect or a separately derived system.
Ground rods and buried electrodes get overlooked as well. Driving one rod and walking away often ignores local requirements for multiple electrodes or a lower resistance test. Poor soil contact, short rods, and missing clamps leave the system with a high impedance to earth. Checking the actual connection at the electrode and tightening accessible hardware can prevent failures that only show up during a fault or lightning strike.
How to Choose Between Metal and Plastic Enclosures
Think about where the enclosure will live before comparing materials. If it’s going outdoors or into a washdown area, metal—especially coated steel or aluminum—handles moisture, UV, and impact far better than most plastics. But that doesn’t mean plastic is automatically out. Polycarbonate and fiberglass-reinforced polyester hold up well in plenty of harsh conditions and won’t corrode the way untreated steel can.
Weight and heat often tip the decision faster than anything else. Metal enclosures dissipate heat naturally and provide built-in EMI shielding, which matters for electronics packed into tight spaces. Plastic is lighter, easier to modify on site, and works fine for low-power gear, but you’ll need to add vents or conductive coatings if thermal or electromagnetic issues creep in.
Cost is rarely just the price per box. Metal usually costs more upfront and can stretch lead times due to cutting, bending, and finishing. Plastic enclosures are cheaper in volume, quicker to mold, and give you more freedom with shapes and colors. If the project will change often or you need a specific look, plastic often wins; if you need long-term ruggedness with minimal maintenance, metal is tough to beat.
Leave Room for Future Circuits, Not Just Today’s Load
When planning an electrical system, it’s tempting to size everything for exactly what you need right now. After all, overbuilding costs money and takes up space. But focusing only on today’s load can box you in later—adding new equipment, upgrading appliances, or shifting usage patterns often means tearing open walls or replacing panels that were never given breathing room. Instead of treating the panel as a fixed snapshot, think of it as a living document. Run extra conduit to a garage or backyard, install a subpanel with spare breaker slots, and choose wire gauges that can handle a step up in amperage. The small upfront cost of unused capacity is nothing compared to the labor of rewiring later.
Future-proofing is less about guessing exactly what will come, and more about preserving options. You don’t need to know whether you’ll buy an electric vehicle, add solar batteries, or convert a shed into a workshop—you just need to make it easy to do any of those things without a major overhaul. A good rule of thumb is to leave at least 20% spare capacity in your main panel and to run at least one empty conduit from the panel to attic or crawlspace. This kind of passive readiness costs little at rough-in but saves thousands down the line. It also helps resale value, since buyers increasingly look for homes that won’t fight them when they want to modernize.
Another overlooked area is labeling and documentation. A panel crammed to the brim with barely-labeled breakers is a headache for anyone who comes after you. But if you leave physical space and clear notes—like marking which circuits are dedicated, which conduits are spare, and what gauge wire runs where—you turn your electrical system into an asset rather than a liability. That’s the real meaning of leaving room: not just empty slots, but a clear path for the future you haven’t met yet.
FAQ
Start by listing every circuit and its expected continuous current, then add 25% headroom for future expansion. Multiply by the supply voltage to get total power. This avoids undersizing and nuisance tripping later.
For coastal or high-humidity areas, fiberglass or polycarbonate resists corrosion better than painted steel. In direct sun, UV-stabilized polycarbonate won't fade or crack as quickly.
Keep at least 36 inches of clear space in front for safe operation and maintenance. Side clearance can be 6 inches if the door opens 90 degrees or more. Check local codes for exceptions in tight electrical rooms.
Install a ventilation fan or louvered vents if internal temperature exceeds 104°F. Place heat-producing breakers near the top, and leave an empty slot between high-load breakers to improve airflow.
Use adhesive heat-shrink labels on each wire inside the box, and a printed circuit directory on the door. Avoid handwritten tags that fade or peel; update the directory whenever you add or move a circuit.
Yes, if the panel feeds sensitive electronics or the area has frequent lightning. A Type 2 surge protector mounts on a spare breaker slot and protects all downstream circuits, not just one outlet.
Bond the metal conduit to the box with a grounding bushing at each end, and run a separate equipment grounding conductor inside. Do not rely on conduit alone as the ground path—corrosion can break continuity over time.
Conclusion
Matching the enclosure to its surroundings is the first real decision, not an afterthought. Outdoor or washdown areas demand a higher IP or NEMA rating, while corrosive environments may push you toward non-metallic or specially coated steel. The metal-versus-plastic debate isn’t about one being superior—metal offers better impact resistance and EMI shielding but can corrode if the finish is scratched; plastic is lighter and naturally insulative, yet it may warp under heat or crack in cold. Before committing, add up today’s loads and then leave at least 20–30% spare capacity. Overloading a distribution box doesn’t just trip breakers; it accelerates insulation aging, loosens terminals from repeated thermal cycling, and quietly raises fire risk. Buying a slightly larger enclosure with room for future circuits costs far less than ripping out a full panel later because two more breakers wouldn’t fit.
Mounting without guesswork means marking a level line, checking wall structure, and using anchors rated for the combined weight of the box and its contents. Keep entry points sealed—moisture and dust intrusion are silent killers of connections. Grounding errors trip up even seasoned installers: the ground bar must bond directly to the enclosure and to the building’s grounding electrode, never share a neutral path, and all metal conduit joints need bonding jumpers. Use properly sized ground conductors; undersized grounds can leave fault current without a low-impedance return. Also, torque every terminal to manufacturer specs, then recheck after a few weeks—thermal movement loosens connections and invites arcing. If you sized the box with future circuits in mind, leave those spare knockouts plugged and labeled, so expansion doesn’t force improvised cable entries that break the environmental seal.
Contact Us
Contact Person: Tonglun Chen
Email: [email protected]
Tel/WhatsApp: 8618906642555
Website: https://www.cncsele.com